About a week ago, I was perusing my usual tech blogs and forums, reading about other people's experiences with the new iPad. I had picked up a Verizon LTE one on launch day, and just wanted to see if there were any interesting tidbits of information, tips and tricks, that other customers were discovering. I came across the following post on MacRumors, and just HAD to give it a look see:
Why would anyone want to do this? To get the best of both worlds: Verizon has the better LTE coverage, but their 3G network definitely tests out to be slower than AT&T's 3G network, which AT&T is spinning as 4G HSPA+, as opposed to 4G LTE. Seeing as how I still have a 1st generation iPad 3G (AT&T) on which I have maintained an automatic monthly renewal of grandfathered UNLIMITED data, I decided to give this a try with my new one!
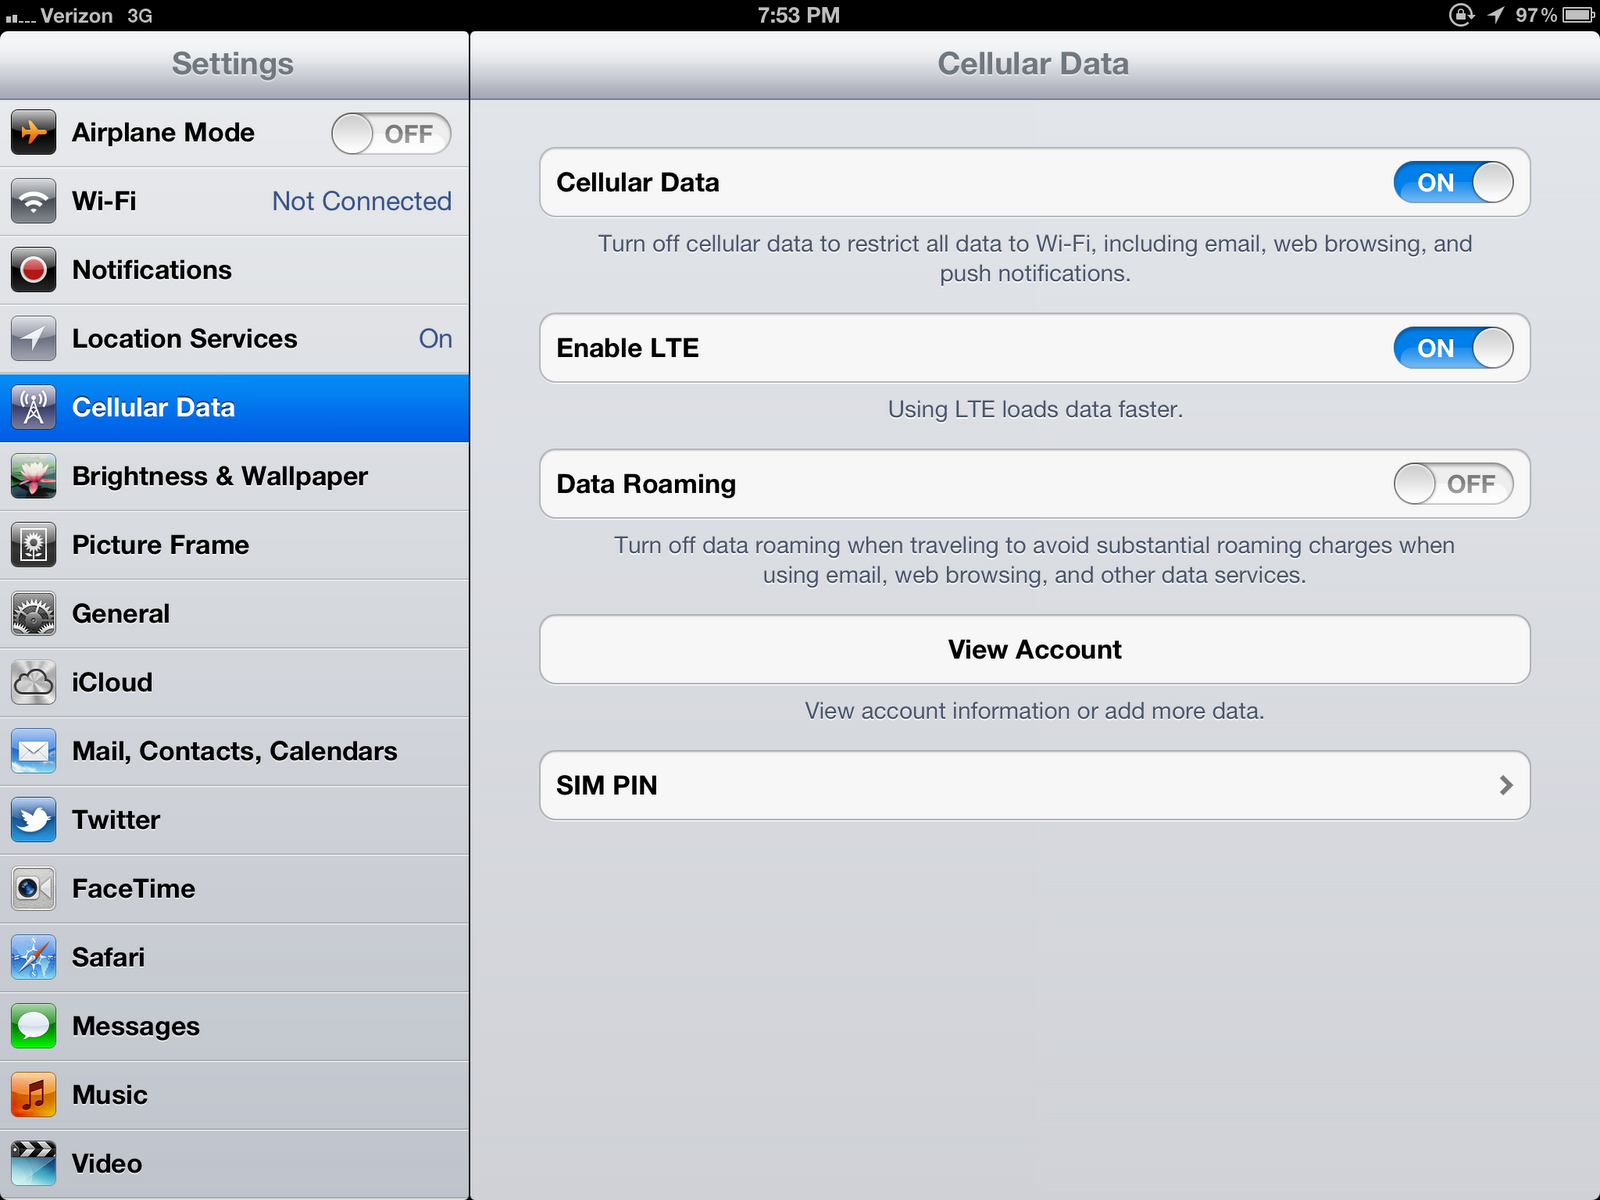
Step 1, Turn on Cellular Data. Mine is usually off as I don't plan on having a constant LTE connection with Verizon, only when I need it, like when I'm on-call for work, on vacation, or on a road trip or something.

Step 2, Swap in the activated AT&T SIM card. Lo and behold, it's automatically detecting the AT&T "4G" connection! It's important that the SIM is already activated, as you won't be able to sign-up for AT&T service from the Verizon iPad. The View Account option will just reject it as an unknown device.

You also want to be sure that the SIM that you're using is meant for an AT&T iPad as opposed to an iPhone. AT&T has been cracking down on customers trying to use their iPhone SIMs in other devices since they're on a contract with subsidized devices.
For me, amazingly enough, everything started working right away. Without any additional configuration changes, I was able to start browsing right away, etc. I ran a quick test with the Speedtest.net app by Ookla and got 5 Mbps download speeds immediately! This is far better than any Verizon 3G test I have done in the past on my iPhone 4.
In case you have any difficulties actually USING the AT&T network once you've connected, there are a few additional steps that you can take to get it working, like changing Access Point Name (APN) settings.
Step 3, Hop on a WiFi connection and browse to www.unlockit.co.nz. This site will allow you to create a custom APN setting by generating a configuration profile that you can download and install from their site directly. This avoids the need for you to download and install Apple's iPhone Configuration Utility, manually create the custom configuration profile, and install it to your iPad.

Step 4, Select Continue, and then select Custom APN on the next screen. On the third screen, select AT&T (Broadband) from the Carrier dropdown menu, and then select Create Profile. This will generate an APN Carrier Settings configuration profile, which you will be prompted to install:

You can select More Details to see exactly what sort of settings are being pushed down by this profile. Generally speaking, it's simply the APN setting and a shortcut to their website placed on your home screen, which you can easily delete:

Step 5, Go back and select Install --> Install Now.

If you have a passcode set for your iPad (highly recommended!), you will be prompted to enter it before the profile will install to your device. Once you're greeted with the Profile Installed screen, select Done.
That's it! You may need to toggle the Cellular Data off and on (or Airplane Mode) to get it to take, but that should be all that's required to get this working!
Now let's say that you're like me, and you like to tinker, and try things out, but at the end of the day, you want to bring things back to how they were, fresh from the factory. You can either remove just the APN Carrier Settings profile, or to be more thorough, you can Reset Network Settings.
May be obvious, but remember to swap out the AT&T SIM, and the Verizon SIM back in. :)
In order to just remove the custom configuration profile, select Settings --> General --> Profile - APN Carrier Settings --> Remove --> Remove:

Once again, if you have a passcode set for your iPad (once again, highly recommended!), you will be prompted to enter it before the profile will be removed from your device. Just clearing out the APN Carrier Settings profile might not be enough to get your iPad happily talking to the Verizon network again. If this happens to be the case, the full Network Settings Reset should do the trick nicely.
Select Settings --> General --> Reset --> Reset Network Settings. Yet again, if you have a passcode set for your iPad (yet again, highly recommended!), you will be prompted to enter it before the settings will be wiped clean. Select Reset.

You iPad will now reboot, and once it comes back on, it should successfully find and connect to the Verizon network, completely oblivious that it was once subjected to the horrific Frankenstein experiment that you just put it through.
And no, even though it's a Verizon iPad, you can't use the Personal Hotspot with your unlimited 3G access because that option actually disappears from the settings once it realizes that you're not on the Verizon network. Finks. :)